
Outlook 2010 and Time Matters
/Updated: 4/25/2014
Time Matters can put a TM Connect button into Outlook 2010. It allows you to save Outlook e-mails into Time Matters, linking them to Contacts and Matters.
If you save e-mails in Time Matters linked to your Contacts and Matters, you and others in your office can easily find all your important e-mail correspondence to and from others.
Time Matters has an option to automatically prompt you to save your Sent e-mails into Time Matters as you send them. (Go to Options | Time Matters | Prompt to Connect when - Sending an Email.)
TM Connect Buttons
The TM Connect buttons have moved from their old locations in Outlook 2003 and 2007.
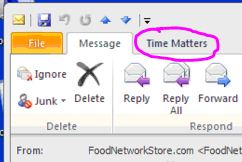
You can TM Connect an e-mail from the main list of e-mails by clicking on either the circled button or the circled Add-Ins tab:
 (I added the first button, above, using the little drop-down control that lets you add buttons to the Quick Access toolbar. The button I added was Add-Ins | Custom Toolbars.)
Or, in a e-mail, you can click on the Time Matters tab:
and then on Connect Email:
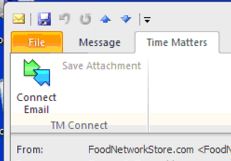
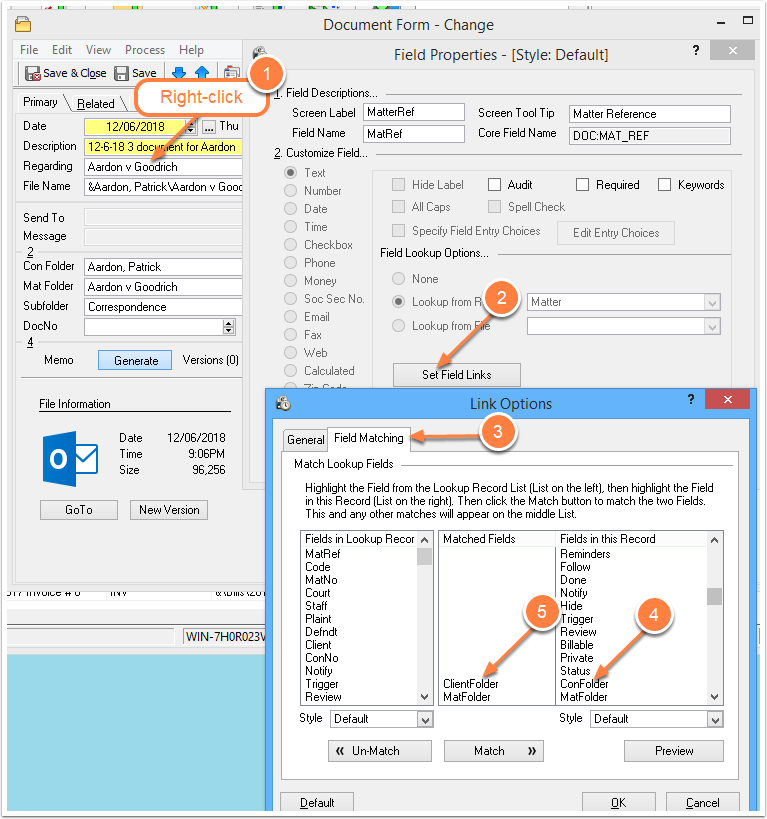
After clicking Connect Email, you see a familiar Time Matters Form where you can link the Time Matters copy of the e-mail to a Contact and Matter.
Fixing the TM Connect Button in Outlook 2010 and 2013
If the TM Connect Button does not appear on the Add Ins tab, you may be able to fix it quickly.
Fix #1
- Close all programs except Time Matters.
- Open Time Matters by right-clicking on Time Matters desktop or Start Menu icon and clicking Run as administrator.
- Go to: Main Menu | File | Setup | General | Workstation Setup
- Click on External Program Setup (or Additional Program Setup in earlier TM versions)
- Uncheck Outlook 2007 and later
- Press OK
- Click on External Program Setup again.
The Outlook 2007 and later box will be checked automatically - Check: TM Connect transfers regarding information
- Press OK
- Open MS Outlook to see if TM Connect appears on the Add Ins tab.
Fix #2
- Outlook Main Menu
- File | Options | Add-Ins | (at bottom) Manage: | select: Disabled Items | Go...
- Select the disabled item.
- Click Enable
- Manage:
- Select: Enabled Items
- Check box: LexisNexis Practice Management Integration
- In the same Add-Ins window, select: COM Add-Ins from the drop-down by Manage:
- Press: Go. Make sure LexisNexis Practice Management Integration is checked.